

Table of Contents
The Sound of Your Harley: Exhaust Upgrade in West Palm Beach
Beyond the look and weight, the real thrill is what you hear and feel—that deep, unmistakable V-twin rumble. A Harley Davidson exhaust upgrade in West Palm Beach transforms a tame stock note into a head-turning roar, helping you command attention while cruising coastal A1A. The right pipe doesn’t just sound better; it cuts backpressure and unlocks real horsepower gains you can feel in the saddle.
To get those performance benefits safely, we recommend pairing your exhaust upgrade with a Harley Davidson stage 1 upgrade. When our master-certified Harley technicians install a new pipe and tune the fueling, the bike breathes deeper and runs cooler. Without proper Harley Davidson exhaust tuning, a free-flowing exhaust can lean out the engine, risking overheating or long-term damage. That’s why Manic Cycle is a premier harley davidson repair shop west palm beach that specializes in exhaust and tuning done right the first time.
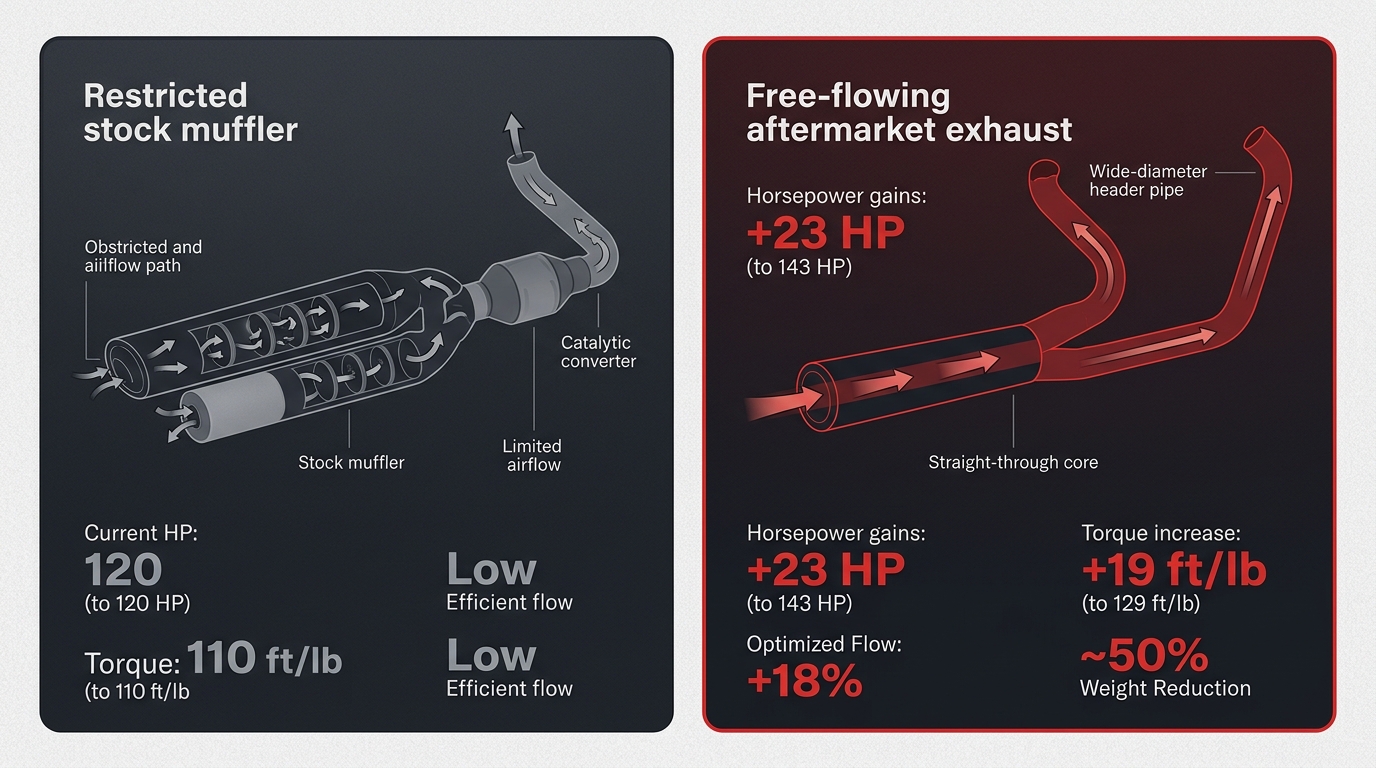
Stock versus upgraded Harley Davidson exhaust performance comparison
Riders often ask whether an aftermarket exhaust voids a factory warranty. According to Motorist.org, the Magnuson-Moss Warranty Act protects owners using aftermarket parts—a dealer must prove the part directly caused a failure before denying coverage. For guaranteed sound and performance, trust a top-rated Motorcycle Mechanic West Palm Beach FL. Once you choose the right exhaust, professional tuning will turn that rumble into reliable, rideable power.
Before You Begin: What You Need to Know About Your Harley Exhaust Upgrade
Planning a Harley Davidson exhaust upgrade West Palm Beach riders know starts with the right prep, and having your essentials ready makes the difference between a smooth Saturday project and a frustrating weekend. The tools and parts checklist isn’t just a suggestion—it’s the foundation for getting the job done right the first time. Getting organized before you turn a single bolt also keeps you from scrambling for a missing socket mid-job.
Tools and Parts Checklist
Before you start, gather a 3/8-inch drive torque wrench (ft-lb), T27 and T40 Torx bits, 10mm and 12mm sockets, a panel removal tool, and an exhaust gasket removal hook. We recommend new OEM exhaust gaskets—part #65327-07A fits most 2017+ touring models—along with high-temp anti-seize compound and new O2 sensor crush washers if you’re reusing your sensors. Do not reuse old gaskets.
Understanding Your Warranty and Local Noise Rules
According to Motorist.org, warranty protection remains intact unless the manufacturer can prove an aftermarket part directly caused the failure. Slip-ons typically don’t trigger warranty issues because they leave the emissions system alone, while a full system that replaces the catalytic converter carries more risk. If your build is a Harley Davidson stage 1 upgrade, the warranty rules differ slightly—so checking with your service writer before tearing into the bike is a smart move. The American Motorcyclist Association notes that Palm Beach County enforces a 96 dB noise limit under SAE J2825 testing, a standard stricter than some neighboring counties and one that real riders keep in mind.
When to Call a Pro: Manic Cycle’s Master Technicians
Most riders find that an exhaust swap is within reach, but we recommend tapping Manic Cycle’s PHD-certified master technicians when comfort or circumstances hit a wall. If you’ve never removed a Harley muffler, if your bike has over 30,000 miles and exhaust bolts may be seized, or if you want professional harley exhaust sound tuning on our in-house dyno right after the install, bring it to us. Harley Davidson exhaust tuning is critical to avoid a lean condition, and real riders know when a job is beyond the garage toolbox. Once you have everything squared away, the actual install begins.
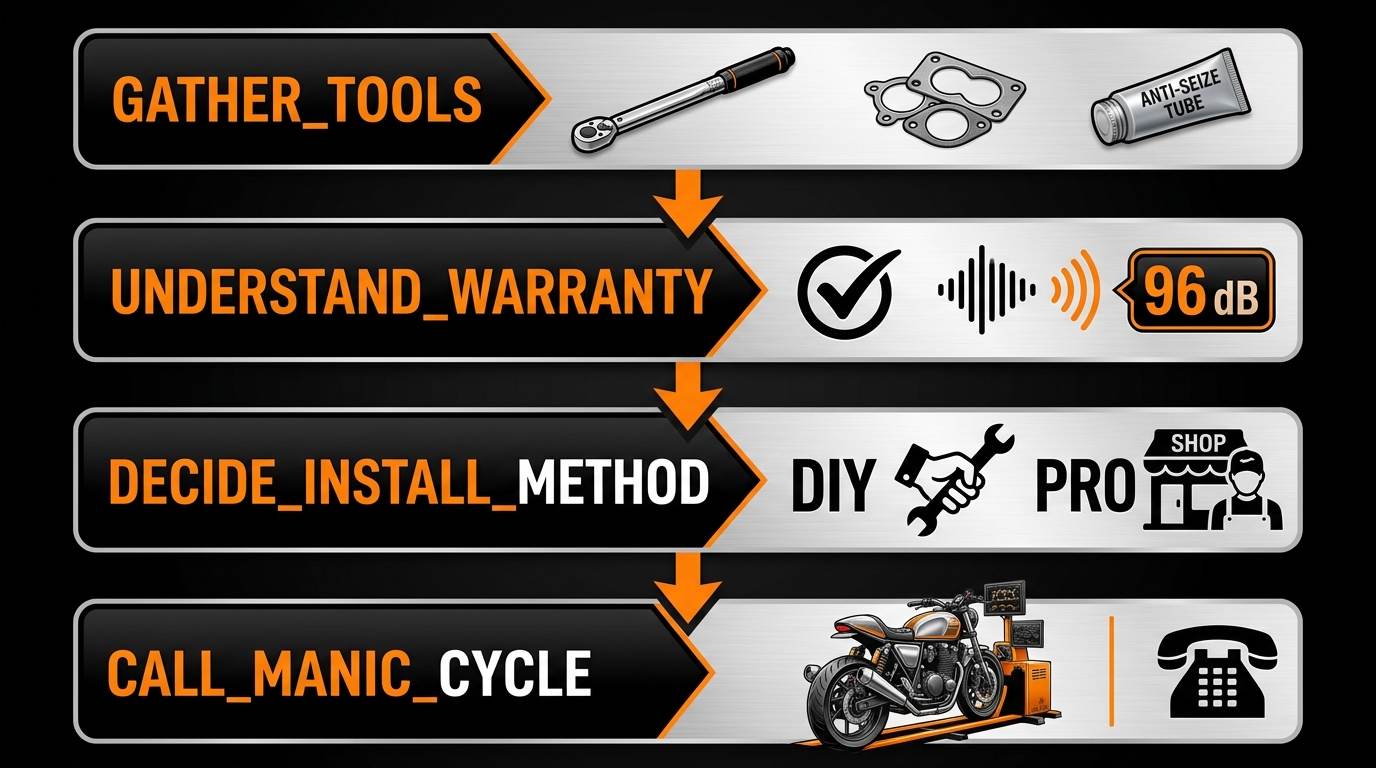
A step-by-step guide: preparing for a Harley exhaust upgrade.
Choose Slip-Ons or a Full Exhaust System
When planning a Harley Davidson exhaust upgrade in West Palm Beach, the first decision is whether to install slip-on mufflers or a complete full exhaust system. We help real riders understand the trade-offs so they can choose the right path for their bike and budget.
Slip-ons replace only the mufflers while keeping the stock head pipes and catalytic converter intact. This straightforward swap delivers a richer sound and a modest performance bump without requiring a Harley Davidson exhaust tuning session.
A full system changes everything from the cylinder heads back, including head pipes and mufflers. It unlocks significant performance gains and is often part of a complete Harley Davidson stage 1 upgrade. However, a full system is heavier, more complex to install, and typically requires an ECU recalibration. According to Motorist.org, aftermarket exhaust modifications can affect warranty coverage, so checking with your dealer is a wise first step.
Remove the Stock Exhaust System
With your bike prepped and tools ready, we can now move on to removing the stock exhaust system. For riders planning a Harley Davidson Exhaust Upgrade in West Palm Beach, this is the most critical hands-on phase of the project. Before picking up a single tool, make sure your motorcycle has been sitting for at least an hour so the pipes are completely cool—touching hot components is the fastest way to ruin an afternoon.
Step 2.1: Remove the Heat Shields Even if your stock shields look straightforward, remove them before touching the exhaust pipes. Most shields use small band clamps or Allen-head fasteners—once they are loose, the shields slide right off and give you clear access to the header flanges.
Step 2.2: Unbolt the Header Pipes Working from the front cylinder head back, loosen the header nuts with a deep socket. Carefully unthread the oxygen sensors by hand before yanking the pipes free; the sensors are precision components and a cracked sensor housing turns a simple afternoon into an expensive parts run.
Step 2.3: Disconnect the Crossover and Hangers If your bike runs a crossover pipe, support the midsection so no weight hangs on the remaining fasteners, then remove the crossover hardware. Next, detach the exhaust hanger bracket and slide the mufflers off their rubber mounts. Save every bolt, nut, and collar—old hardware is often the perfect reference when you are bench-checking your new kit.
Install New Exhaust Gaskets and Hardware
When performing a Harley Davidson exhaust upgrade, fresh gaskets are non-negotiable. With the old system off, now is the time to refresh the gaskets and hardware. Old copper or crush-ring gaskets are single-use only—inspect the ports, remove every trace of the old ring, and clean the mating surface with fine sandpaper to remove carbon deposits and burrs before installing the new OEM exhaust port gaskets with the tapered face into the head and the wider flange facing the pipe.
During a Harley Davidson stage 1 upgrade, the hardware is often the most overlooked detail. We always install new flange nuts and bolts. Cylinder head fasteners are torqued to 60-84 in-lbs, while header bolts typically call for 15-20 ft-lbs depending on your model. A torque wrench is mandatory here—real riders know over-tightening can warp exhaust flanges or strip threads instantly.
Mount the New Exhaust System
With the old system off, we’re ready to mount your new exhaust in West Palm Beach—this is the heart of any Harley Davidson exhaust upgrade. Grab fresh exhaust gaskets and press them firmly into the cylinder head ports; reusing old gaskets almost always leads to leaks. Next, lift the headers into position and start every header bolt and muffler clamp by hand so the system floats loosely. We tighten in sequence, working from the cylinder heads outward, gradually pulling the pipes to factory torque specs. Once snug, check clearance around the swingarm, brake lines, and shock absorbers—hot metal rubbing a hose can ruin a Saturday ride. Also route the O2 sensor wires neatly away from the pipes and confirm nothing is pinched.
Check for Leaks and Fitment
With the new exhaust bolted in place, it’s time to verify everything is sealed and aligned. After completing a Harley Davidson exhaust upgrade in West Palm Beach, checking for leaks and fitment is the most critical step to protect your engine and ensure peak performance. We start the engine and let it idle while applying a soapy water solution to all gasket connections, watching for any air bubbles that signal a leak. At the same time, we listen carefully for abnormal hissing or ticking sounds.
Tune Your Harley After the Exhaust Upgrade
Once your new exhaust is installed, the next crucial step is tuning. When you get a Harley Davidson exhaust upgrade in West Palm Beach, recalibrating your engine’s air-fuel mixture is essential to prevent lean running, overheating, and power loss. Proper engine remapping is a core part of any Harley Davidson stage 1 upgrade, pairing your aftermarket exhaust and high-flow intake with an optimized tuner. At Manic Cycle, our master-certified technicians perform expert dyno tuning in West Palm Beach to ensure your bike runs perfectly.
Test Ride and Final Sound Check
Idle Check: Start the engine while the motorcycle is still safely on the stand. Listen for a deeper, richer exhaust note at idle and stay alert for any unusual ticking or rattling that could signal a loose clamp.
The Test Ride: Head out for a short, 10 to 15-minute ride, keeping it cautious. Cruise at a steady low speed to hear the mellow hum, then smoothly roll on the throttle for a few moderate acceleration runs.
Final Hot Check: Back in the garage, let the engine idle for two minutes and conduct one last visual sweep. With the engine off and cool, firmly re-check every mounting bolt.
Troubleshooting Common Exhaust Upgrade Issues
The New Exhaust Sounds Too Loud or Harsh: A brutal, raspy tone often means something isn’t sealed or tightened correctly. Check the exhaust gaskets for proper seating and ensure the baffles are tight.
Check Engine Light or Backfiring: Backfiring and a glowing Check Engine Light usually point to an air/fuel imbalance. The definitive fix is a Harley Davidson stage 1 upgrade: we pair a high-flow intake with a tuner to re-map the ECU.
Fitment Problems: Persistent vibration or odd rattling often comes from misaligned mounting points. Check the exhaust hanger alignment and verify clearance.
Find Your Perfect Exhaust Sound at Manic Cycle
We believe the perfect sound is a personal signature. For riders seeking a true harley exhaust sound tuning experience, our PHD-certified master craftsmen use professional dyno tuning to precisely dial in your custom exhaust note. Ultimately, our comprehensive Harley Davidson exhaust tuning process delivers a bike that sounds as incredible as it performs.
This article was researched and written with the assistance of AI tools.